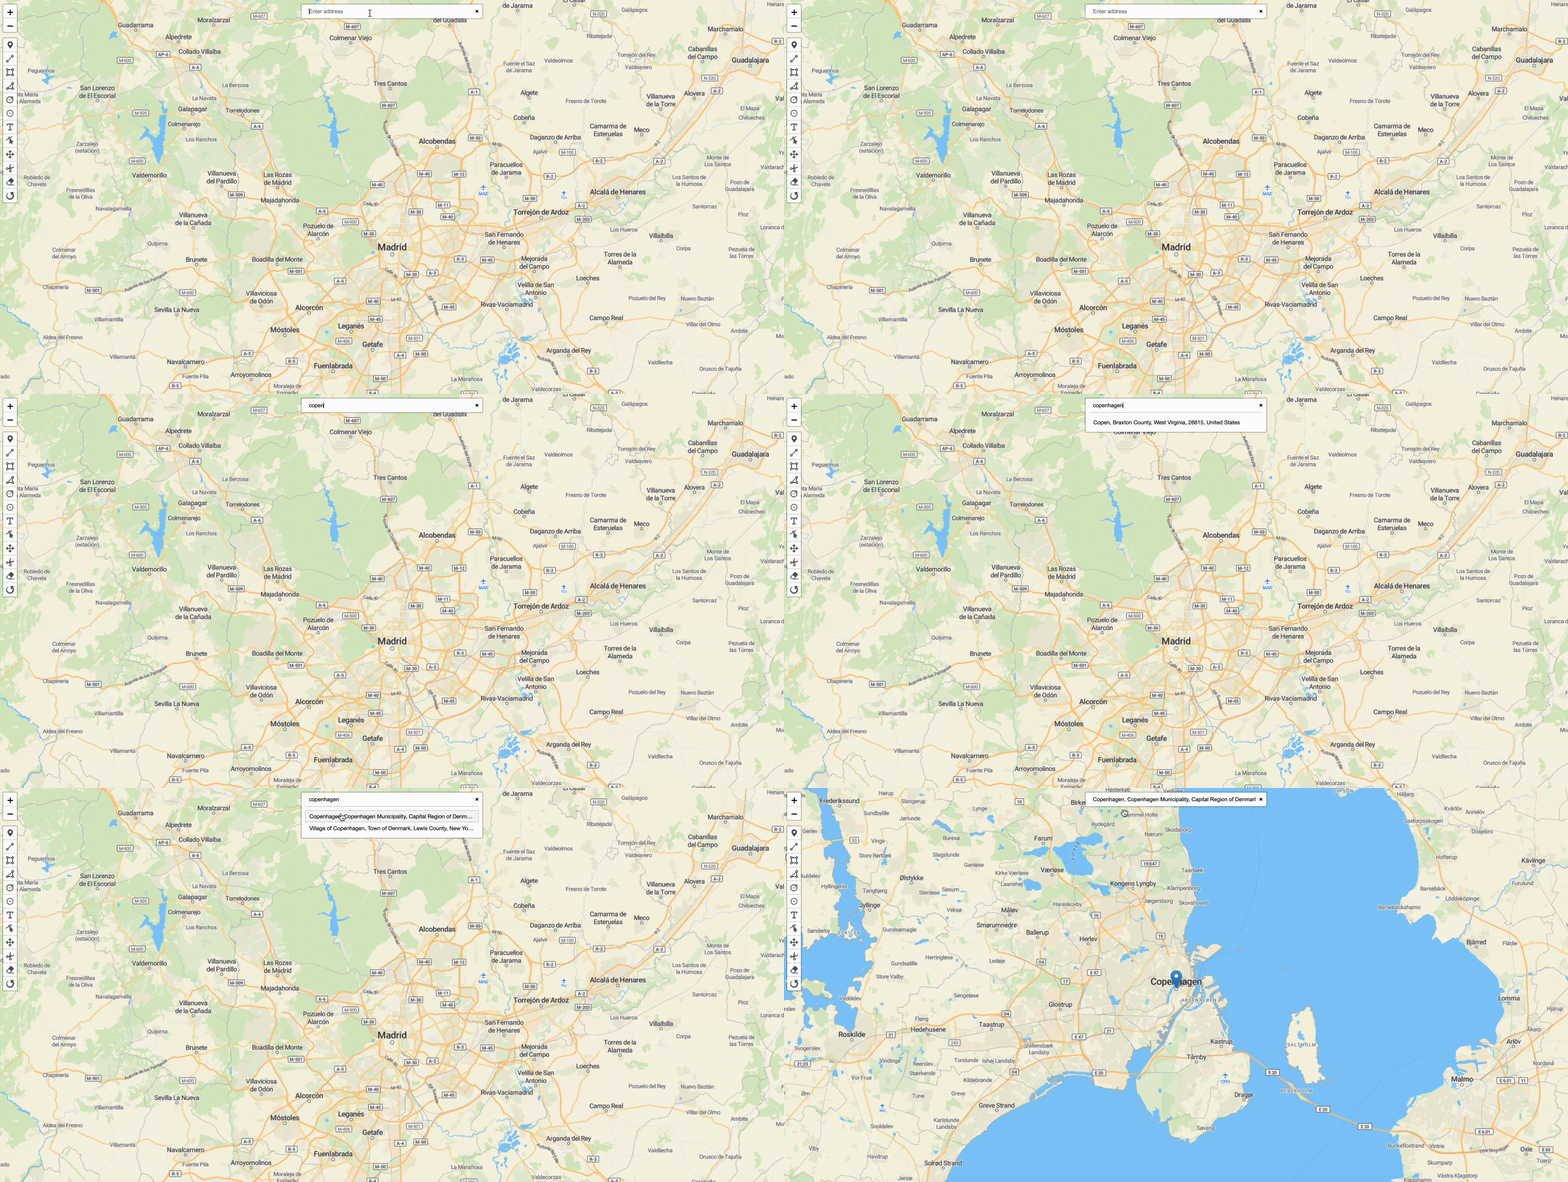

When building spatial applications, the entry point is often a map. Navigating such a map can be done by zooming and scrolling around to find the place you are looking for, but this is not efficient. To build a superior user experience, you will likely want to include some geocoding in your application. Geocoding is the process of going from a text input for a place, such as a city name or address, to that location on a map in terms of latitude and longitude. While Geoman does not provide geocoding services directly, our users are often building applications that require geocoding and hence the reason for this guide.
This blog post extends our "How to get started with Geoman and Next.js" blog post. In our example, we will use the OSS repo Leaflet.GeoSearch as it provides flexibility for picking the geocoding provider that suits your applications needs and comes with out-of-the-box support for major providers (see Leaflet.GeoSearch's docs).
Setting up the project
In order to get started, we use our example of creating a Leaflet app using Next.js (you find the code for this on our GitHub repo). From this starting point we will install Leaflet.GeoSearch and create a React Component to include our geosearch.
If you just want to get going, you can find the complete example here.
As a first step, we install Leaflet.GeoSearch using NPM:
npm install leaflet-geosearch
Next, we need to include the Leaflet.GeoSearch js and css
src/app/layout.tsx
import type { Metadata } from "next";
import { Inter } from "next/font/google";
import "./globals.css";

const inter = Inter({ subsets: ["latin"] });

export const metadata: Metadata = {
  title: "Create Next App",
  description: "Generated by create next app",
};

export default function RootLayout({
  children,
}: Readonly<{
  children: React.ReactNode;
}>) {
  return (
    <html lang="en">
      <head>
        <link
          rel="stylesheet"
          href="https://unpkg.com/[email protected]/dist/leaflet.css"
          integrity="sha256-p4NxAoJBhIIN+hmNHrzRCf9tD/miZyoHS5obTRR9BMY="
          crossOrigin=""
        />
        <link
          rel="stylesheet"
          href="https://unpkg.com/@geoman-io/leaflet-geoman-free@latest/dist/leaflet-geoman.css"
        />

        <link
          rel="stylesheet"
          href="https://unpkg.com/[email protected]/dist/geosearch.css"
        />

        <script
          src="https://unpkg.com/[email protected]/dist/leaflet.js"
          integrity="sha256-20nQCchB9co0qIjJZRGuk2/Z9VM+kNiyxNV1lvTlZBo="
          crossOrigin=""
          defer
        >
        </script>
        <script
          src="https://unpkg.com/@geoman-io/leaflet-geoman-free@latest/dist/leaflet-geoman.js"
          defer
        >
        </script>
        <script
          src="https://unpkg.com/leaflet-geosearch@latest/dist/bundle.min.js"
          defer
        >
        </script>
      </head>
      <body className={inter.className}>{children}</body>
    </html>
  );
}
Creating the React Component
We will next create the React component containing the geosearch functionality. In our example, we are using OpenStreetMap as geocoding provider. For other providers, Leaflet.GeoSearch provides excellent documentation, e.g. using Google, which works out-of-the-box as long as you have created Google API key. The layout of the search bar can be customized. We pick a simple bar layout with default settings for autocomplete and markers.
src/components/GeoSearch.tsx
import { createControlComponent } from "@react-leaflet/core";
import { GeoSearchControl, OpenStreetMapProvider } from "leaflet-geosearch";
import "leaflet-geosearch/dist/geosearch.css";

const createGeoSearchInstance = () => {
  const provider = new OpenStreetMapProvider();
  // @ts-ignore
  const searchControl = new GeoSearchControl({
    provider,
    style: "bar",
  });
  return searchControl;
};

export const GeoSearchControlComponent = createControlComponent(
  createGeoSearchInstance,
);
We can then include this component in our map. You can find the updated Map.tsx file below.
src/app/Map.tsx
import React from "react";
import { MapContainer, TileLayer } from "react-leaflet";
import { GeomanControl } from "./GeomanControl";
import Events from "./Events";
import { GeoSearchControlComponent } from "./GeoSearch";
const Map = () => {
return (
<>
<MapContainer
center={[51.505, -0.09]}
zoom={13}
scrollWheelZoom={true}
style={{ width: "100vw", height: "100vh" }}
>
<TileLayer
attribution='<a href="https://www.maptiler.com/copyright/" target="_blank">© MapTiler</a> <a href="https://www.openstreetmap.org/copyright" target="_blank">© OpenStreetMap contributors</a>'
url="https://tile.openstreetmap.org/{z}/{x}/{y}.png"
/>
<GeomanControl position="topleft" oneBlock />
<Events />
<GeoSearchControlComponent />
</MapContainer>
</>
);
};
export default Map;
Now we are all set and can run npm run dev. The screenshot below shows our
app.

That's it! Now we have a Next.js application with a map that includes Geoman and simple geosearch. Thank you for following along.

