

Next.js is a popular React framework for the web and is a great companion for Leaflet and Geoman. We have put together a short guide on how to get started by setting up the scaffolding. If you would rather get straight to coding, you can find an example app on our GitHub repo.
Use create-next-app to set up the project
Next.js ships natively with the JavaScript package managers like NPM, Yarn, Bun, and PNPM. Using NPX, you can set up a Next.js project by opening your terminal and running:
npx create-next-app@latest
This will start a CLI to guide you through selecting a project name, whether you
will use TypeScript and other app configurations.
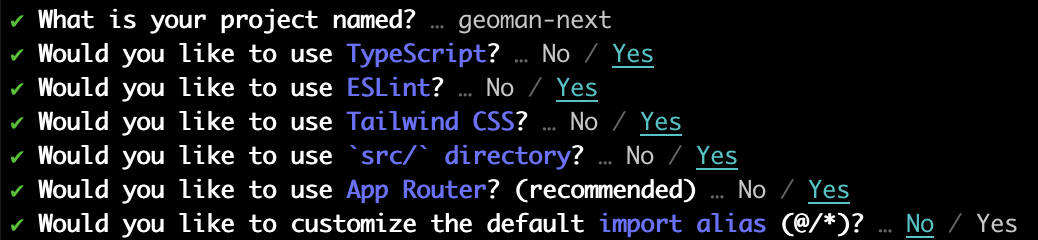 For our config we pick TypeScript and set up a
 src/ directory.
Install Leaflet and Leaflet-Geoman
Now that we have set up our Next.js project, we need to install both Leaflet and Geoman. At the project root open a terminal and run:
npm i @geoman-io/leaflet-geoman-free leaflet react-leaflet
npm install -D @types/leaflet
After installing these, we are ready to implement the business logic for our app. We will be creating three react components, one for handling our leaflet map, one for listening to events and one for creating the Geoman controls.
React Components for our Leaflet Map, Events Listeners and Geoman Controls
We start with the React component for the Leaflet map by creating a file
src/components/Map.tsx. This component displays our Leaflet map.
src/components/Map.tsx
import React from "react";
import { MapContainer, TileLayer } from "react-leaflet";
import { GeomanControl } from "./GeomanControl";
import Events from "./Events";
const Map = () => {
return (
<>
<MapContainer
center={[51.505, -0.09]}
zoom={13}
scrollWheelZoom={true}
style={{ width: "100vw", height: "100vh" }}
>
<TileLayer
attribution='<a href="https://www.maptiler.com/copyright/" target="_blank">© MapTiler</a> <a href="https://www.openstreetmap.org/copyright" target="_blank">© OpenStreetMap contributors</a>'
url="https://tile.openstreetmap.org/{z}/{x}/{y}.png"
/>
<GeomanControl position="topleft" oneBlock />
<Events />
</MapContainer>
</>
);
};
export default Map;
Next, we create an event listener component in the file
src/components/Events.tsx. This component integrates with our Leaflet map
using React Leaflet and adds event listeners for different interactions like of
editing map layers.
src/components/Events.tsx
import { useEffect } from "react";
import { useMap } from "react-leaflet";

const Events = () => {
  const map = useMap();

  useEffect(() => {
    if (map) {
      map.on("pm:create", (e) => {
        console.log("Layer created:", e);

        e.layer.on("click", () => {
          console.log("Layer clicked", e);
        });

        e.layer.on("pm:edit", () => {
          console.log("Layer edited", e);
        });

        e.layer.on("pm:update", () => {
          console.log("Layer updated", e);
        });

        e.layer.on("pm:remove", (e) => {
          console.log("Layer removed:", e);
        });

        e.layer.on("pm:dragstart", (e) => {
          console.log("Layer dragstart:", e);
        });

        e.layer.on("pm:dragend", (e) => {
          console.log("Layer dragend:", e);
        });
      });

      map.on("pm:drawstart", (e) => {
        console.log("Layer drawstart:", e);
      });

      map.on("pm:drawend", (e) => {
        console.log("Layer drawend:", e);
      });

      map.on("pm:globaldrawmodetoggled", (e) => {
        console.log("Layer globaldrawmodetoggled:", e);
      });

      map.on("pm:globaldragmodetoggled", (e) => {
        console.log("Layer globaldragmodetoggled:", e);
      });

      map.on("pm:globalremovalmodetoggled", (e) => {
        console.log("Layer globalremovalmodetoggled:", e);
      });

      map.on("pm:globalcutmodetoggled", (e) => {
        console.log("Layer globalcutmodetoggled:", e);
      });

      map.on("pm:globalrotatemodetoggled", (e) => {
        console.log("Layer globalrotatemodetoggled:", e);
      });
    }
  }, [map]);

  return null;
};

export default Events;
Finally, we create the React component for the Geoman Control bar which adds the Geoman functionality to our Leaflet map.
src/components/GeomanControl.tsx
import { createControlComponent } from "@react-leaflet/core";
import * as L from "leaflet";
import "@geoman-io/leaflet-geoman-free";
import "@geoman-io/leaflet-geoman-free/dist/leaflet-geoman.css";

interface Props extends L.ControlOptions {
  position: L.ControlPosition;
  drawCircle?: boolean;
  oneBlock?: boolean;
}

const Geoman = L.Control.extend({
  options: {},
  initialize(options: Props) {
    L.setOptions(this, options);
  },

  addTo(map: L.Map) {
    if (!map.pm) return;

    map.pm.addControls({
      ...this.options,
    });
  },
});

const createGeomanInstance = (props: Props) => {
  return new Geoman(props);
};

export const GeomanControl = createControlComponent(createGeomanInstance);
We can now integrate these three components in our Next.js app.
Integrate the React Components
We need to update the page.tsx logic to include our components and to display
a Leaflet map.
src/app/page.tsx
"use client";
import dynamic from "next/dynamic";

const Map = dynamic(() => import("../components/Map"), {
  ssr: false,
});

export default function Home() {
  return (
    <>
      <Map />
    </>
  );
}
We need also need to update the layout.tsx to include the Leaflet and Geoman
scripts and CSS in our HTML head tag.
src/app/layout.tsx
import type { Metadata } from "next";
import { Inter } from "next/font/google";
import "./globals.css";

const inter = Inter({ subsets: ["latin"] });

export const metadata: Metadata = {
  title: "Create Next App",
  description: "Generated by create next app",
};

export default function RootLayout({
  children,
}: Readonly<{
  children: React.ReactNode;
}>) {
  return (
    <html lang="en">
      <head>
        <link
          rel="stylesheet"
          href="https://unpkg.com/[email protected]/dist/leaflet.css"
          integrity="sha256-p4NxAoJBhIIN+hmNHrzRCf9tD/miZyoHS5obTRR9BMY="
          crossOrigin=""
        />
        <link
          rel="stylesheet"
          href="https://unpkg.com/@geoman-io/leaflet-geoman-free@latest/dist/leaflet-geoman.css"
        />

        <script
          src="https://unpkg.com/[email protected]/dist/leaflet.js"
          integrity="sha256-20nQCchB9co0qIjJZRGuk2/Z9VM+kNiyxNV1lvTlZBo="
          crossOrigin=""
          defer
        >
        </script>
        <script
          src="https://unpkg.com/@geoman-io/leaflet-geoman-free@latest/dist/leaflet-geoman.js"
          defer
        >
        </script>
      </head>
      <body className={inter.className}>{children}</body>
    </html>
  );
}
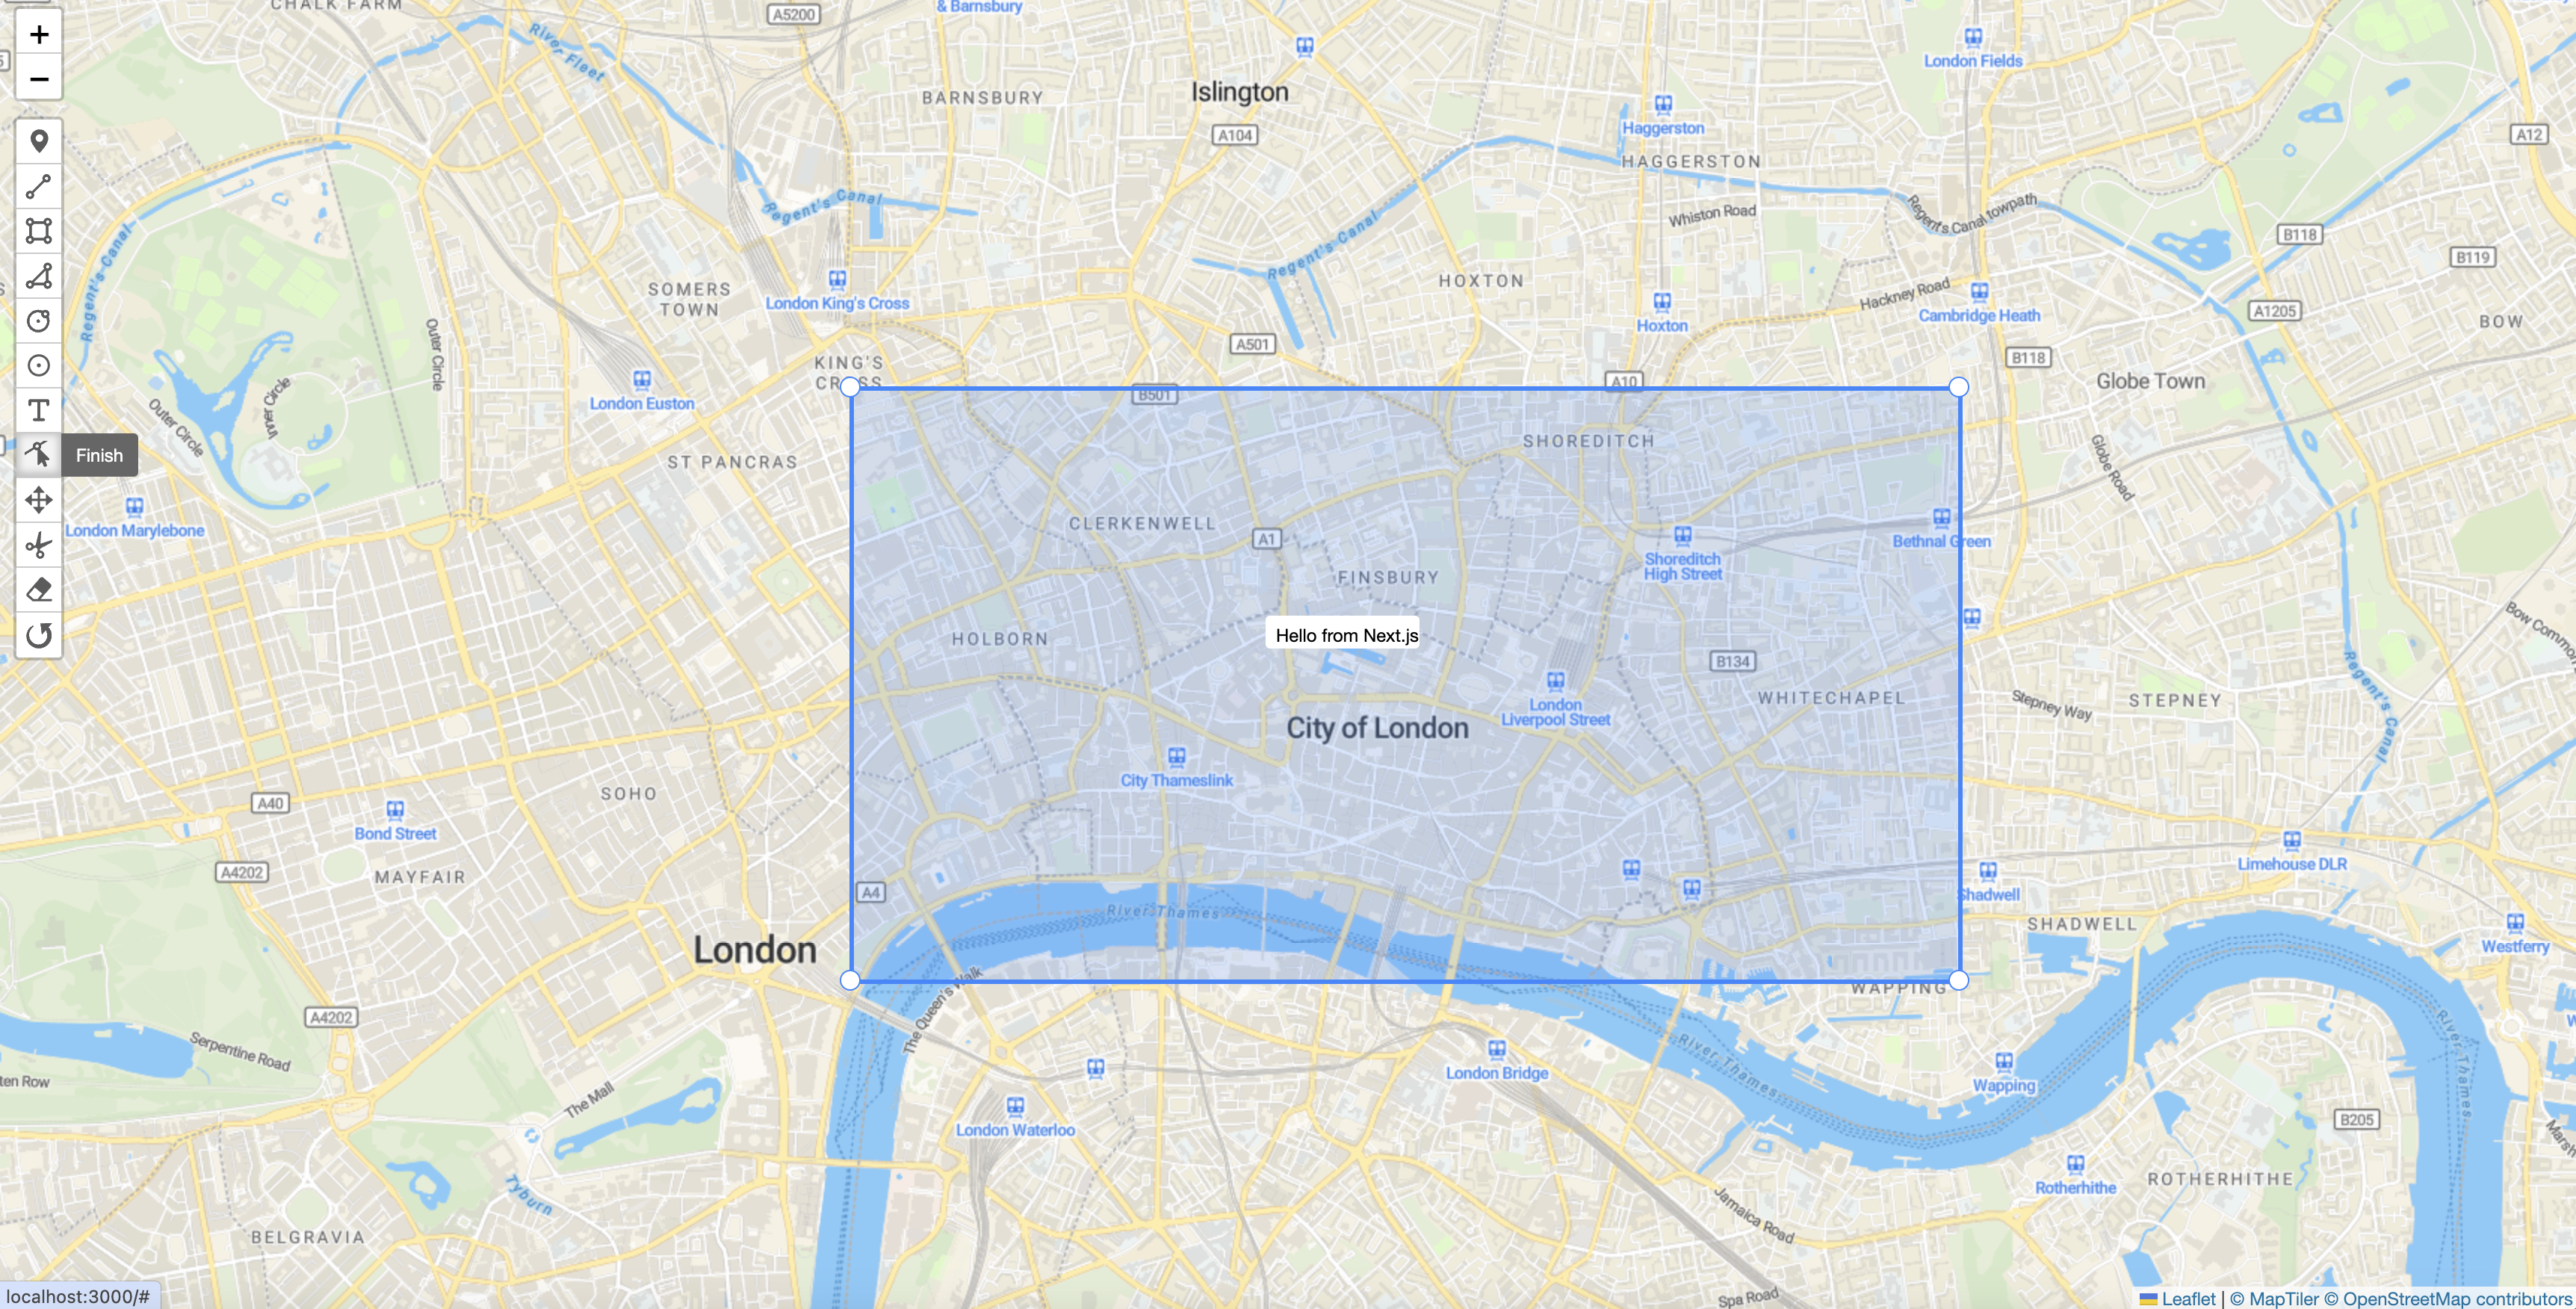
With these edits in place, we now have the scaffolding for a Next.js app that
displays a Leaflet map with the Geoman controls in the browser. Runnning
npm run dev:
GitHub repo with full code and more examples
Get the full code by visiting our GitHub repo and find other starter kits for React Apps with Geoman.
If you have an interesting example of how you have used Geoman and Next.js, please you share it on our GitHub Repo.
Want more geo-editing insights?
Get tips, tutorials, and product updates delivered to your inbox.
No spam. Unsubscribe anytime.