

Back in April, we wrote a blog post on how to get started with a mapping project using Leaflet-Geoman, Leaflet in a React app using Vite. You can find the full blog post here. With our introduction of MapLibre-Geoman, we will also show you how to get set up for using MapLibre and MapLibre-Geoman in your Vite app.
Create a Vite project
We follow the same steps for creating a Vite project as we did for our Leaflet-Geoman app. In your terminal run:
npm create vite@latest
This will start a CLI to guide you through selecting a Project Name, your
JavaScript Framework, and your Variant. In this example we pick Vanilla as the
framework and TypeScript as the Variant. We name our project maplibre-vite
Install MapLibre and MapLibre-Geoman
With our Vite project set up, we need to install MapLibre and Maplibre-Geoman.
npm i maplibre-gl @geoman-io/maplibre-geoman-free
After installing these, we are ready to implement the business logic for our app.
Refactor main.ts and style.css to implement business logic
To keep things simple, we simply implement our business logic in the src/main.ts.
Below you will find the refactored file.
src/main.ts
    import './style.css'

    import 'maplibre-gl/dist/maplibre-gl.css';
    import '@geoman-io/maplibre-geoman-free/dist/maplibre-geoman.css';

    import ml from 'maplibre-gl';
    import { GeoJsonImportFeature, Geoman, type GmOptionsPartial } from '@geoman-io/maplibre-geoman-free';


    document.querySelector<HTMLDivElement>('#app')!.innerHTML = `
      <div>MapLibre-Geoman Demo map
            <div id="dev-map"></div>
      </div>
    `

    const mapLibreStyle: ml.StyleSpecification = {
        version: 8,
        glyphs: 'https://demotiles.maplibre.org/font/{fontstack}/{range}.pbf',
        sources: {
            'osm-tiles': {
                type: 'raster',
                tiles: [
                    'https://tile.openstreetmap.org/{z}/{x}/{y}.png',
                ],
                tileSize: 256,
                attribution: '© OpenStreetMap contributors',
            },
        },
        layers: [
            {
                id: 'osm-tiles-layer',
                type: 'raster',
                source: 'osm-tiles',
                minzoom: 0,
                maxzoom: 19,
            },
        ],
    };

    const map = new ml.Map({
        container: 'dev-map',
        style: mapLibreStyle,
        center: [0, 51],
        zoom: 5,
    });

    const gmOptions: GmOptionsPartial = {
        // geoman options here
    };

    // create a new geoman instance
    const geoman = new Geoman(map, gmOptions);

    // callback when geoman is fully loaded
    map.on('gm:loaded', () => {
        console.log('Geoman fully loaded');

        // Here you can add your geojson shapes for example
        const pointFeature1: GeoJsonImportFeature = {
            type: 'Feature',
            geometry: { type: 'Point', coordinates: [0, 51] },
            properties: {},
        };
        // add a geojson shape to the map
        geoman.features.addGeoJsonFeature({ shapeGeoJson: pointFeature1 });


        const pointFeature2: GeoJsonImportFeature = {
            type: 'Feature',
            geometry: { type: 'Point', coordinates: [3, 52] },
            properties: {},
        };
        // geoman instance is also available on the map object
        map.gm?.features.addGeoJsonFeature({ shapeGeoJson: pointFeature2 });

    });
Next, we refactor src/style.css.
src/style.css
:root {
  font-family: Inter, system-ui, Avenir, Helvetica, Arial, sans-serif;
  line-height: 1.5;
  font-weight: 400;

  color-scheme: light dark;
  color: rgba(255, 255, 255, 0.87);
  background-color: #242424;

  font-synthesis: none;
  text-rendering: optimizeLegibility;
  -webkit-font-smoothing: antialiased;
  -moz-osx-font-smoothing: grayscale;
}

body {
  margin: 0;
  display: flex;
  place-items: center;
  min-width: 320px;
  min-height: 100vh;
}

h1 {
  font-size: 3.2em;
  line-height: 1.1;
}

#app {
  max-width: 1280px;
  margin: 0 auto;
  padding: 2rem;
  text-align: center;
}

#dev-map {
  height: 60vh;
  width: 80vw;
}
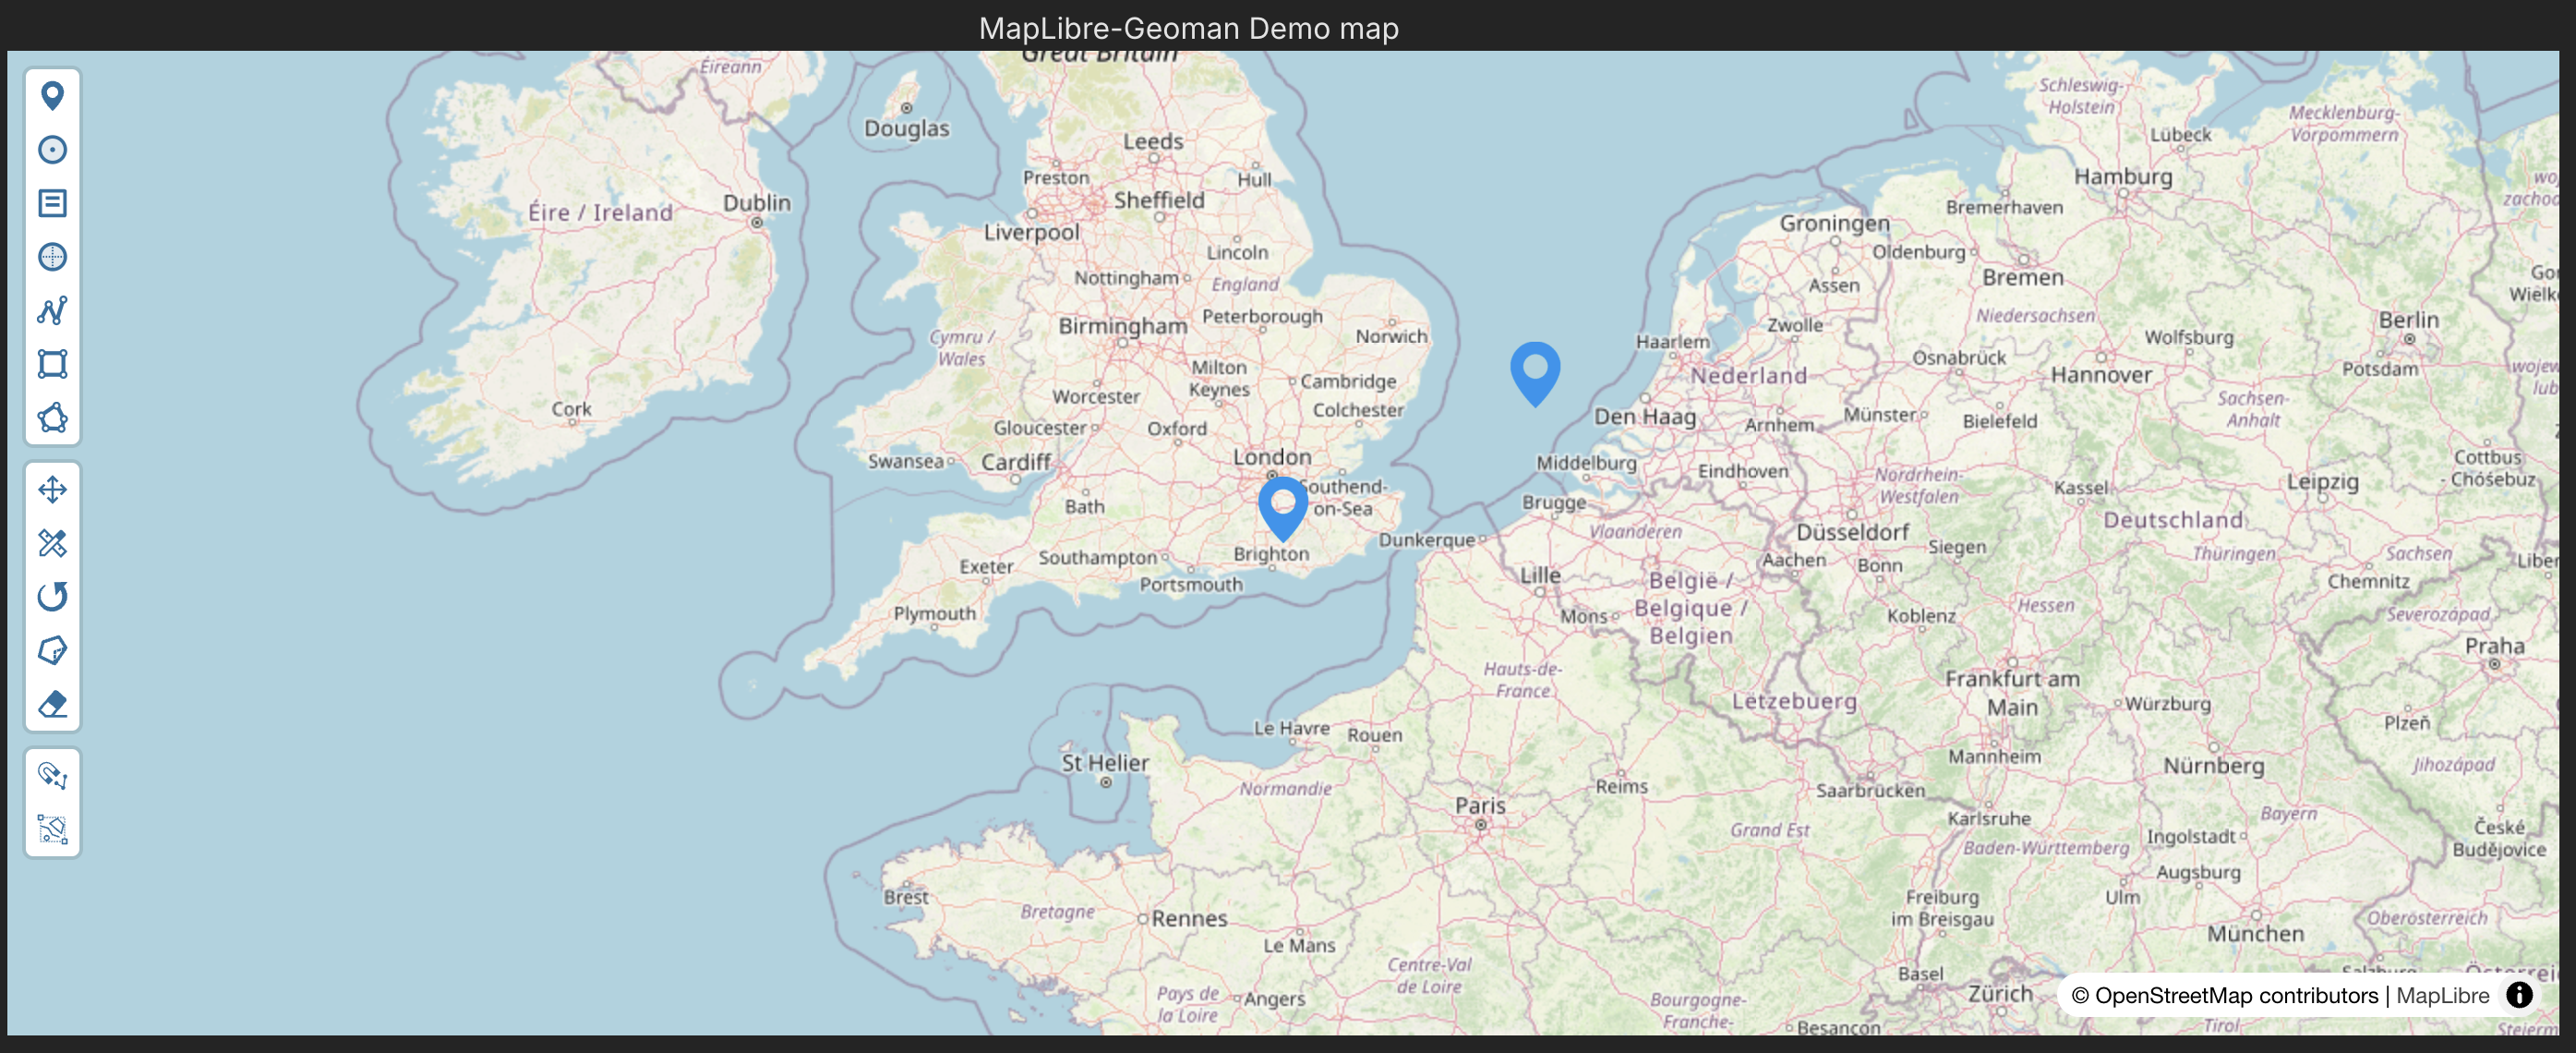
Running the app
That's it. We now have a simple web app created by Vite that displays a MapLibre map
with the Geoman controls. Runnning npm run dev:
GitHub repo with full code and more examples
You can visit GitHub repo to see the full code and other starter kits for MapLibre-Geoman.
If you have an interesting example of how you have used Geoman and Vite, we invite you to share it on our GitHub Repo.
Want more geo-editing insights?
Get tips, tutorials, and product updates delivered to your inbox.
No spam. Unsubscribe anytime.